


 Danish Pastry
I have to give credit to the family member who gave me this recipe when I was a kid. Annette Kluck’s Danish Pastry is a family favorite for Christmas or any holiday. It does take a day and a half to make but well worth the wait.
Time: 1 day for dough, 4 hours to roll, rise and bake. Difficulty: Experienced baker
Danish Recipe:
- 5 cups all-purpose flour (divided)
- 1/4 cup sugar
- 1 cup butter, unsalted (cut into small pieces, keep cold)
- 3 eggs, room temperature and well beaten
- 1 cup whole milk, warmed to 110°F
- 3 pkgs. instant yeast
- 2 cans Solo cake and pastry filling, any flavor
Icing:
- 2 Tbls. Butter, melted
- 3 Tbls. milk or water
- 1 tsp. Vanilla
- 1 1/2 cups powdered sugar
 Stir yeast into warm milk, let sit for 5 minutes.
 After 5 minutes yeast will be dissolved and get pasty.
 Make a Sponge:
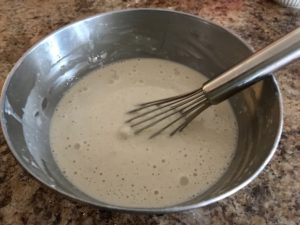
Combine 3/4 cups of the flour with the yeast and milk mixture in a small bowl. Whisk until smooth, set aside to allow yeast to double.
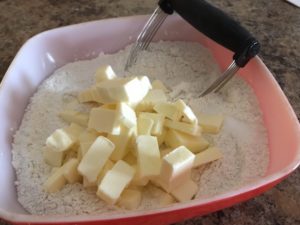 Combine remaining 4 1/4 cups of flour with sugar and salt in a medium sized mixing bowl. Add the small pieces of cold butter and work with a pastry blender, fork or your hands like for pie crust or biscuits until butter is incorporated an mixture is crumbly. Do not overmix!
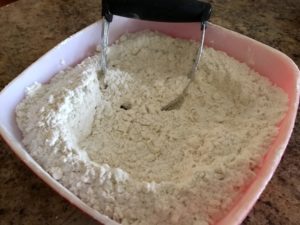 Danish dough flour mixture resembles pie crust or biscuit dough.
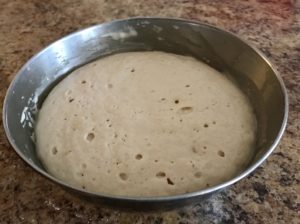 At this time your sponge should have doubled in size and look very light and airy with craters on the top. If not, wait another 10 minutes and put flour/butter mixture in refrigerator to keep butter cold.
 Pour sponge and 3 beaten eggs on top of flour mixture. Stir to combine into a dough then work with hands and fold it over a few times like you would for biscuits to create layers. Do not over work or you will melt the butter in the dough.
 Shape dough into a single oblong piece in the center of the bowl. It will be divided in two when making Danish.
 Cover with plastic wrap and refrigerate overnight or for a minimum of 8 hours to let the Danish dough rise, chill and relax.
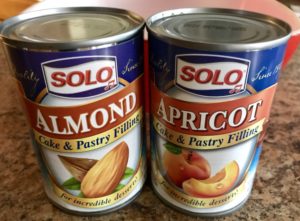 Open you cans of SOLO filling, 1 can for each Danish. This brand is the perfect consistency and amount for each Danish. You can of course make your own or use other types of filling but be sure to not over fill the Danish so it doesn’t burst during baking.
SOLO Apricot Filling , SOLO Almond Filling , SOLO Poppy Seed Filling , SOLO Cherry Filling
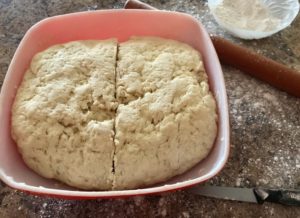 The next day after the dough has doubled in size, remove from the refrigerator and cut the dough in half.
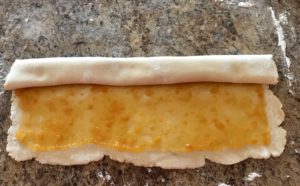
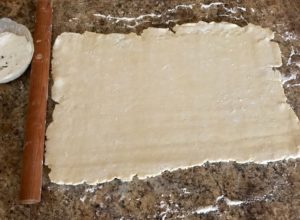 Roll out the dough on a lightly floured work surface to a rectangle approximately 11 x 17.
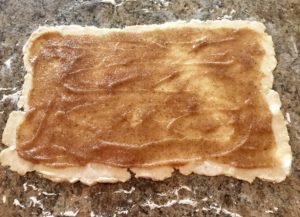 Spread one can of SOLO filling on top of dough leaving about 1/2″ free around the dough.
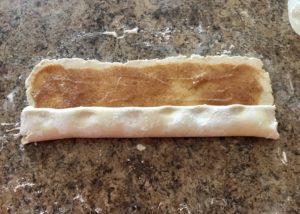 Roll the dough loosely to minimize bursting of the filling during baking.
 Seal edges and sides by pinching dough together, be careful not to pinch thru the filling.
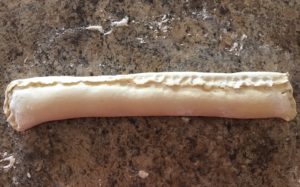
 Repeat the process with the other piece of dough.
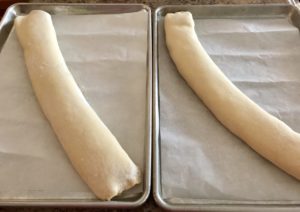 Carefully lift and set Danish onto a cookie sheet (1/2 sheet pan) lined with parchment paper. Brush with a small amount of milk to prevent the dough for drying out, leave on the counter to rise.
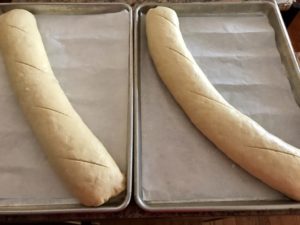 After about 2 hours on the counter when the dough has plumped up and about an extra half of its original size, cut a few vents into the top of the dough. Brush with milk again lightly and bake in a 375°F home oven for 20 minute. Turn the trays and switch shelves half way thru to ensure proper and even baking of both Danish.
 Remove from oven and let cool for 15 minutes. Combine all ingredients for the icing, add more liquid or powdered sugar to achieve the icing consistency you desire.
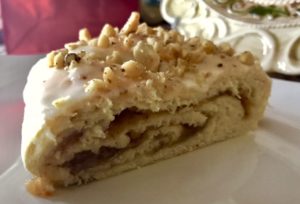
Ice the Danish and top with crushed walnuts or almonds if you desire.
Serve warm or cover lightly with plastic wrap and serve within 2 days
ENJOY!!
Check out some of our other recipes.
Leave a Reply
Leave a positive response